For companies with a physical office or store it is a must to be present on Google My Business. We already explained how to create a Google My Business account. If your business has ten or more locations, you should create a Location Group (previously known as business accounts) which provides a safe way to share management of your locations with multiple users.
How to Manage Multiple Location Groups
Google My Business location groups make it easy for multiple administrators to manage a set of locations. Start with creating a Google Account, then go to Google My Business “Manage Locations” and create locations with the “Create location group”-menu.
Location Group
With a Location Groups you can share the management of your locations with multiple users and assign individual rights for each location. We will show you below how to create a business account.
1. Create a Google Account
First of all it is advisable to create a new Google account. Do not use your personal login for the business account, but create a general company login instead. The email address you are using for this account should contain the business domain.
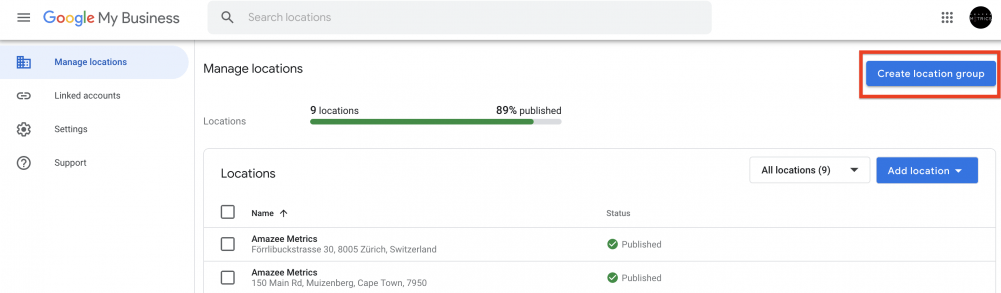
2. Create a Location Group/Business Account
Go to Manage locations and click in the menu on the top right side on “Create location group”. Enter a location group/business account name and click “Done”.
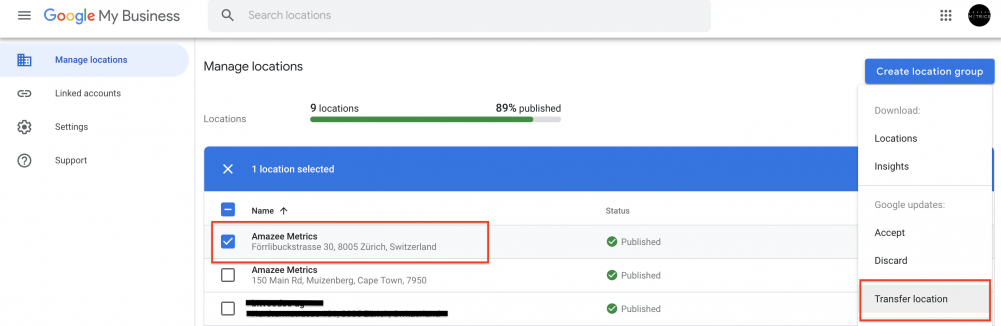
3. Transfer the Ownership of Locations
4. Owners and managers of location groups
Location groups make it easier for multiple administrators to manage a set of locations. There are two types of location group/business account users: owners and managers.
Bulk Location Management
You can manually add additional locations, but if you have ten or more locations we recommend using the bulk location management. This works as follows:
1. Create Table with Locations
Click on “Add location” and select “Import locations”. Then click on “Download the template”. Open the CSV file and fill out the required fields for every business location.
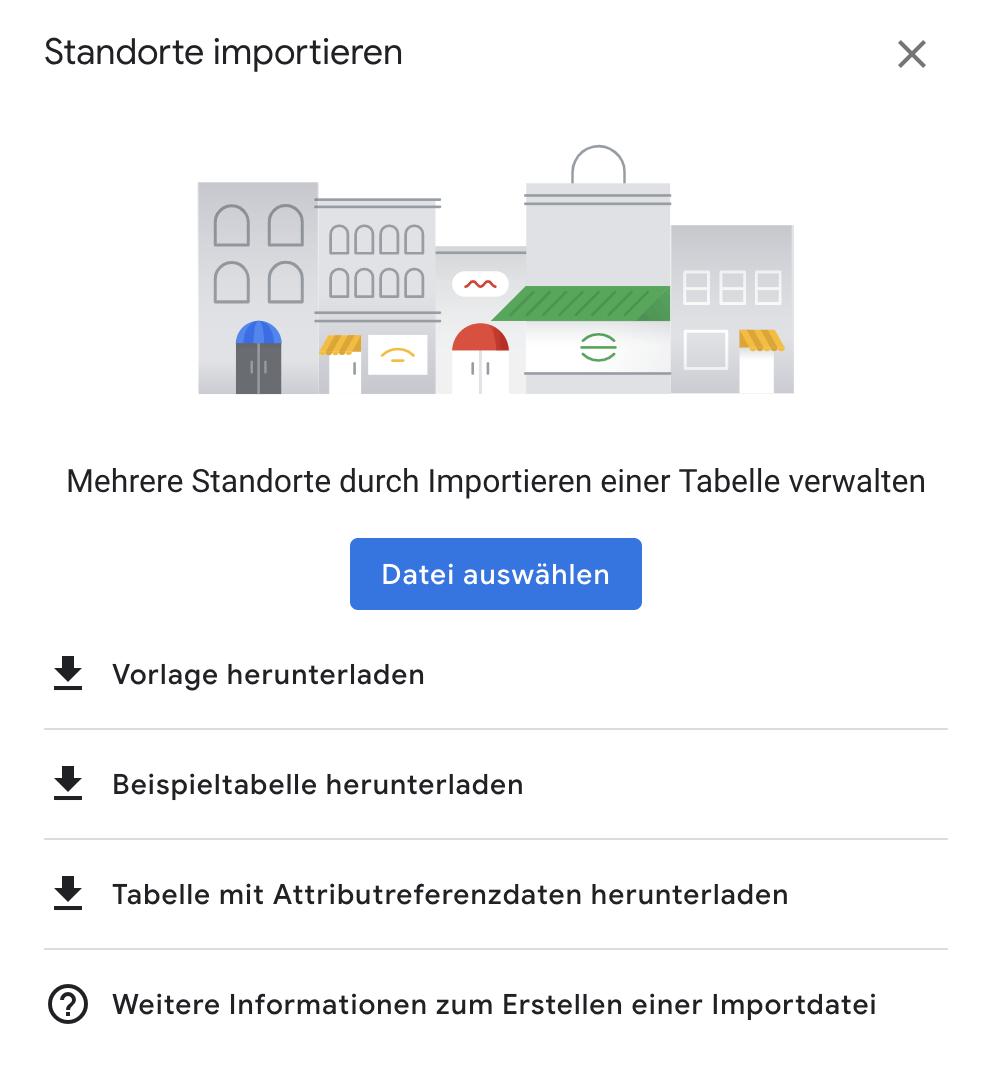
2. Upload Table with Locations
Save the table in one of the following formats: XLS, XLSX, ODS, CSV, TXT or TSV. Now upload the file by clicking on “Select file to import”. Duplicate locations will automatically be merged after the import.
3. Verification of Business Information
You can verify all locations in your account at once with the bulk verification (for ten or more locations). To do so, click on the confirmation icon on the top right side and fill out the verification form. Enter an email address that contains your website domain.
The verification process can take up to a week. Google will use the entered email address to ask additional questions if necessary and to send you status updates.
4. Change Location Information
If you need to adjust your location information, you can also do this with the bulk location management. Just download your locations via the menu, make the changes and upload the file again. Review the changes in the import preview and click on “Apply”.