
With one extra line of code, Google Analytics will anonymize the IP addresses of all your visitors. It does this by replacing the last octet (the last four digits) in the IP address with 0000.
Why Would You Anonymize IPs?
The main reason for the anonymization of IPs is to increase data privacy, as traffic can no longer be traced back to a specific IP. This is especially prevalent with the new European GDPR laws, which classify IP addresses as personal information. As a result, there are much greater security requirements around storing IP addresses that are not anonymized. For more on GDPR take a look at our blog posts here.
Tracking Internal Users with IP Anonymization turned on
As mentioned above, turning on IP anonymization is incredibly simple. There is however one small catch. When IP addresses are anonymized, you are no longer able to make use of IP filters to exclude internal sessions (sessions from within your own company).
Instead, you will need to filter your internal traffic in Google Analytics based on a custom dimension. The following steps show you how to set this up using Google Tag Manager and Google Analytics.
Setting up your Filter
To set the custom dimension on which your filter is based, you need to differentiate your internal visitors from external visitors in Google Tag Manager. To make sure this data is persistent, you are also going to need to set a cookie for all internal visitors.
In order to set the cookie, you need to find a way to identify a visit from an internal visitor. In this example, I am going to cover a method that makes use of a query parameter, as this can be used for any site.
Step 1: Setting the “internal cookie”
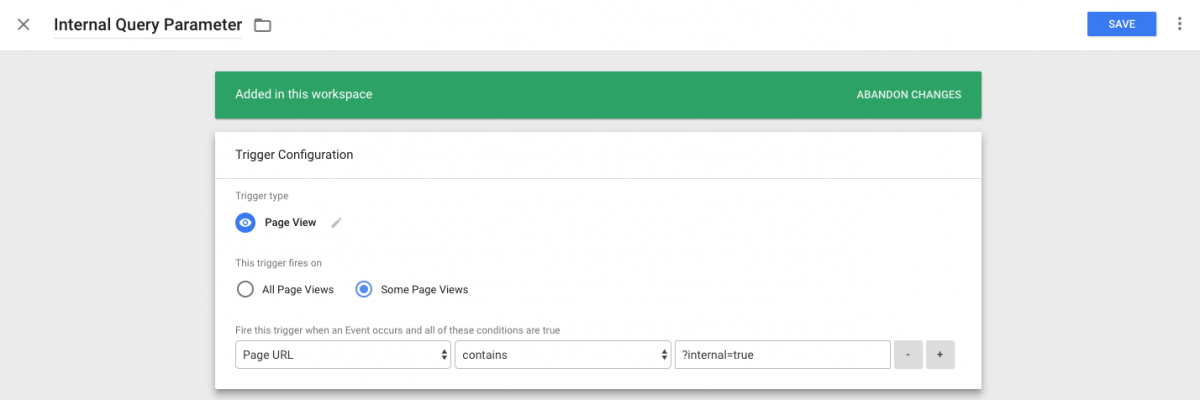
a) Create a trigger to fire the cookie setting tag:
As you are making use of a query parameter to identify internal traffic, all you need is a simple trigger that checks for this parameter. I have made use of a query parameter of internal=true, but you can easily change this if this conflicts with your existing setup.
Here is what our trigger looks like:
b) Create a tag to set the cookie:
Create a Custom HTML Tag with the following code:
<script>
// Sets expiration for three years in the future
var date = new Date();
var dateTimeNow = date.getTime();
date.setTime(dateTimeNow + 94608000000);
var expiration = date.toUTCString();
// Sets internalTraffic cookie for all subdomains
document.cookie = “internalTraffic=true; expires=”+expiration+”; path=/; domain=.” + location.hostname.replace(/^www\./i, “”);
</script>
This code will set a cookie with a value of internalTraffic=true whenever the tag is fired. I have set the expiration date of this cookie as three years in the future. If you would like to change the expiration, you can easily do so by changing the value of the expiration variable in the code.
Add the trigger set up above and once you are finished, your Tag should look something like this:
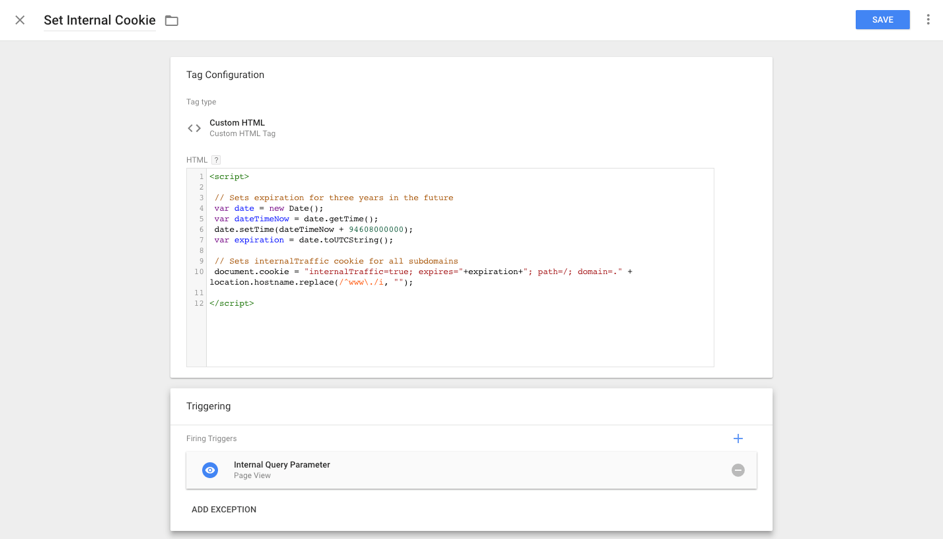
This tag and trigger combination will now set a cookie to identify internal visitors whenever they visit any URL on your site with a query parameter of internal=true.
Note:
If your website has pages that can only be visited by internal users – for example pages behind a login or a staging environment – you could replace the query parameter trigger with a trigger that fires on only these pages.
Alternatively, if you are able to convince your dev team to help you out, a cleaner method would be to set the cookie server side.
Step 2: Reading the internal cookie in GTM
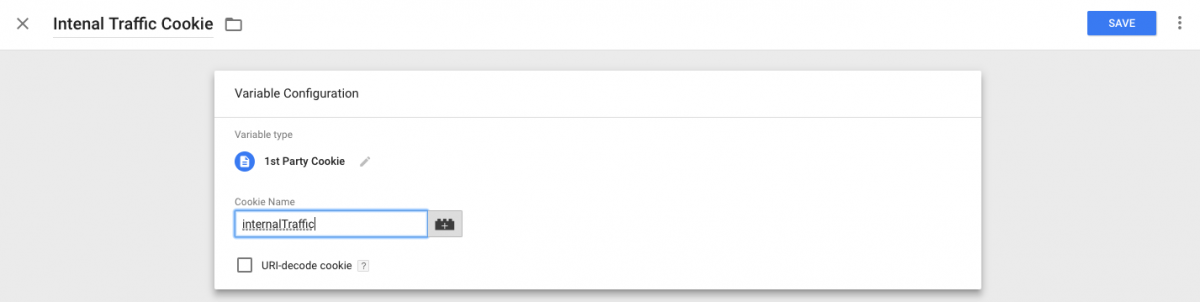
The next step is to check whether the cookie you have just created exists before sending a hit to Google Analytics. You can do this by creating a Google Tag Manager variable.
To do this, create a new variable based on the 1st party cookie named “internalTraffic”. Here is a screenshot of your variable:
Step 3: Creating an “internal” custom dimension
Within Google Analytics, create a new custom dimension to keep track of whether a hit came from an internal or external visitor.
To do this, simply create a new user scoped custom dimension called “internal traffic”. Once you have created this, keep track of the dimension number as you will use this in the next step.
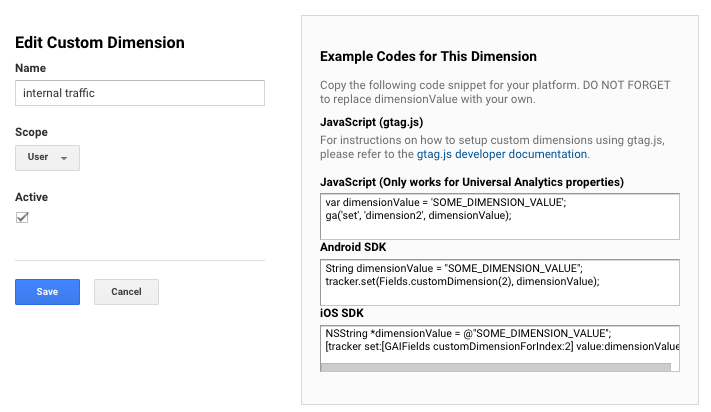
In the example above, you can see it is using dimension 2.
Step 4: Setting the custom dimension value in GTM
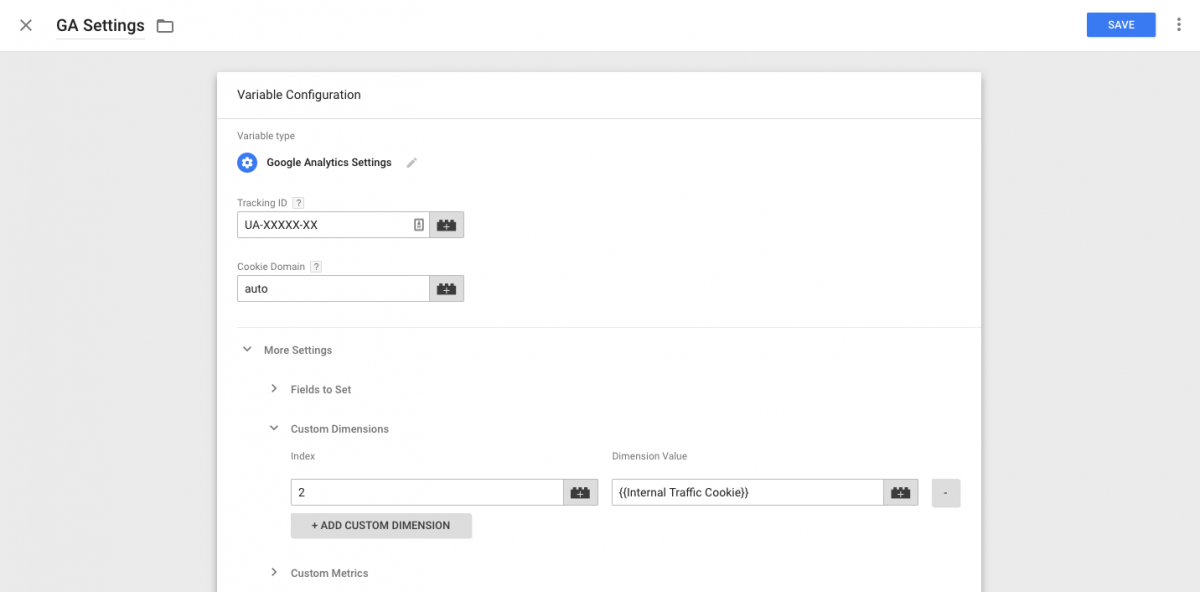
In order to populate this custom dimension in GA, you are going to need to alter your GA Settings variable in GTM.
(If you are not using a GA Settings variable, you can just make these changes under “more settings” in your GA page view tag).
- In your GA Settings variable, under “more settings”, click on “custom dimension” and add a custom dimension.
- Under “index”, use the dimension number from the step above, in this example it was dimension 2.
- Then under value, use the GTM variable you created in step 2 – in this example it was “Internal Traffic Cookie”.
Your GA Settings variable should now look like this:
Once you have added this, you can go ahead and publish all your GTM changes.
Step 5: Filtering based on the custom dimension
Once all of the previous steps have been implemented, you will be able to filter or segment your Google Analytics traffic based on the newly created custom dimension.
To set up a filter based on this dimension, log in to Google Analytics and navigate to the Admin section of your property. Within your property:
- Create a new view and name it appropriately, for example “External Traffic”. For more on setting up views, take a look at this blog post.
- Within your new view, add a filter – you can call it “Exclude Internal Traffic”.
- Select “custom” as your filter type
- Check the “exclude” radio-button
- Then select “internal traffic” as your filter field (this should appear under custom dimensions).
- Then add “true” in the filter field and hit Save.
Your new view will now filter out any visitor who visits your site with the query parameter defined in step 1.
Getting Internal Visitors to visit Pages with the Query Parameter
The final task is getting internal visitors to actually visit the website using the query parameter. You only need to get them to visit the website once, however this can still be quite a task.
The easiest way to do so, is to include the link in an email that is sent to the entire company. How you get people to click the link is something we will leave up to you, we have however found that the promise of free beer worked well for us.
If you have any more questions relating to the tracking of internal visitors, please send me an e-mail.