External links are links on your website that do not point to other pages on your site and users that click on them will be redirected away from the site. Often, we have no insight into exactly why someone leaves, however, we can get an idea of where they go to. By default, Google Analytics cannot provide more information on this, which is why this post will take you through an implementation that can with Google Tag Manager (GTM).
In this tutorial we assume that you already have a Google Tag Manager account, have created a Container, and have installed it in your website. You should also have a Google Analytics account setup for your website and have linked it to GTM.
Set up outbound (external) link tracking by following the steps below.
Step 1: Create an Auto-Event Variable
In Google Tag Manager, you have a variety of built-in variables to select from, as well as the option to create your own custom variables if needed. Older GTM guides might have suggested to track external link clicks with the Click URL variable but GTM has made this task much easier these days. A new and simple way of doing this is using the Auto-Event Variable.
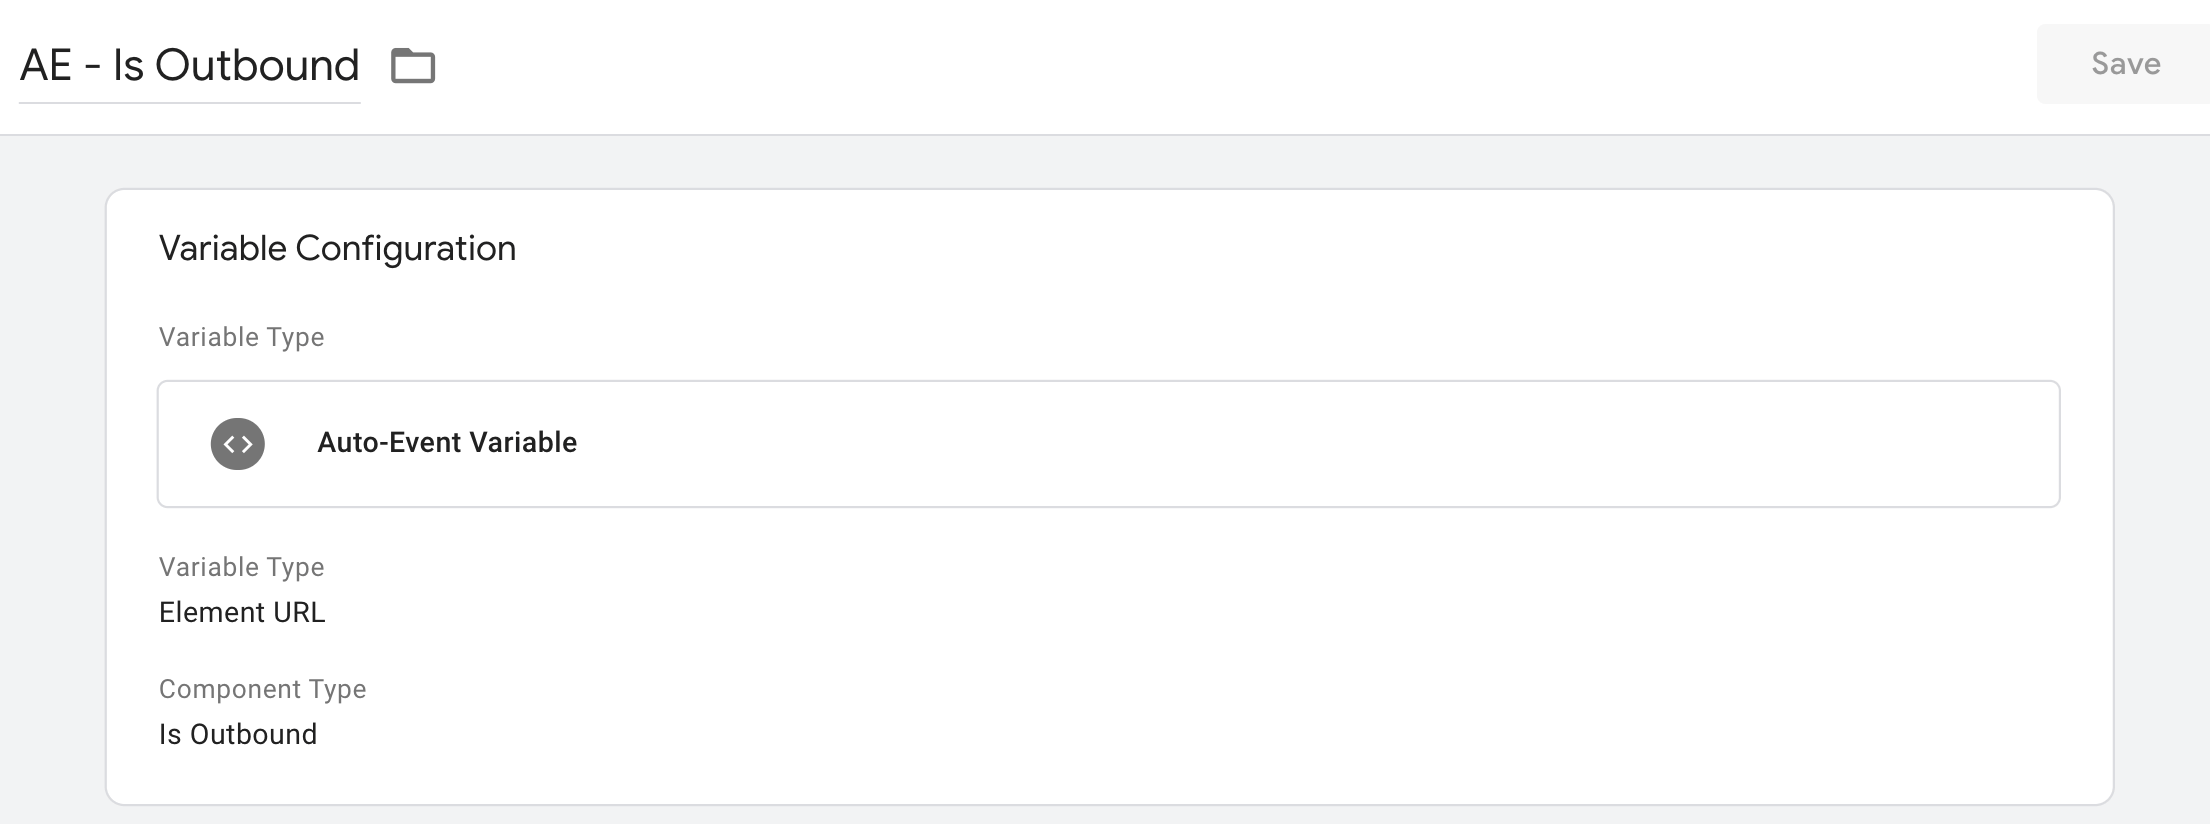
To set this up, go to “Variables” in the Google Tag Manager user interface, and scroll down to “User-Defined Variables” and click “New”. From the variable selector, choose “Auto-Event Variable” as the variable template.
Set your variable configuration:
- Variable Type: “Element URL”
- Component Type: “Is Outbound”. This differentiates outbound links from internal ones. The variable returns trueif the clicked link URL did not match the current domain (https://www.yourdomain.com), and false if it did.
- Affiliated Domains: If you want GTM to consider other domains as internal domains as well (your web shop, blog, social media profiles, affiliates), you can add them as a comma-separated list in this field. Keep in mind that you just need to add your top-level domain (yourdomain.com) to track all your sub-domains.
Step 2: Enable The “Click URL” Variable
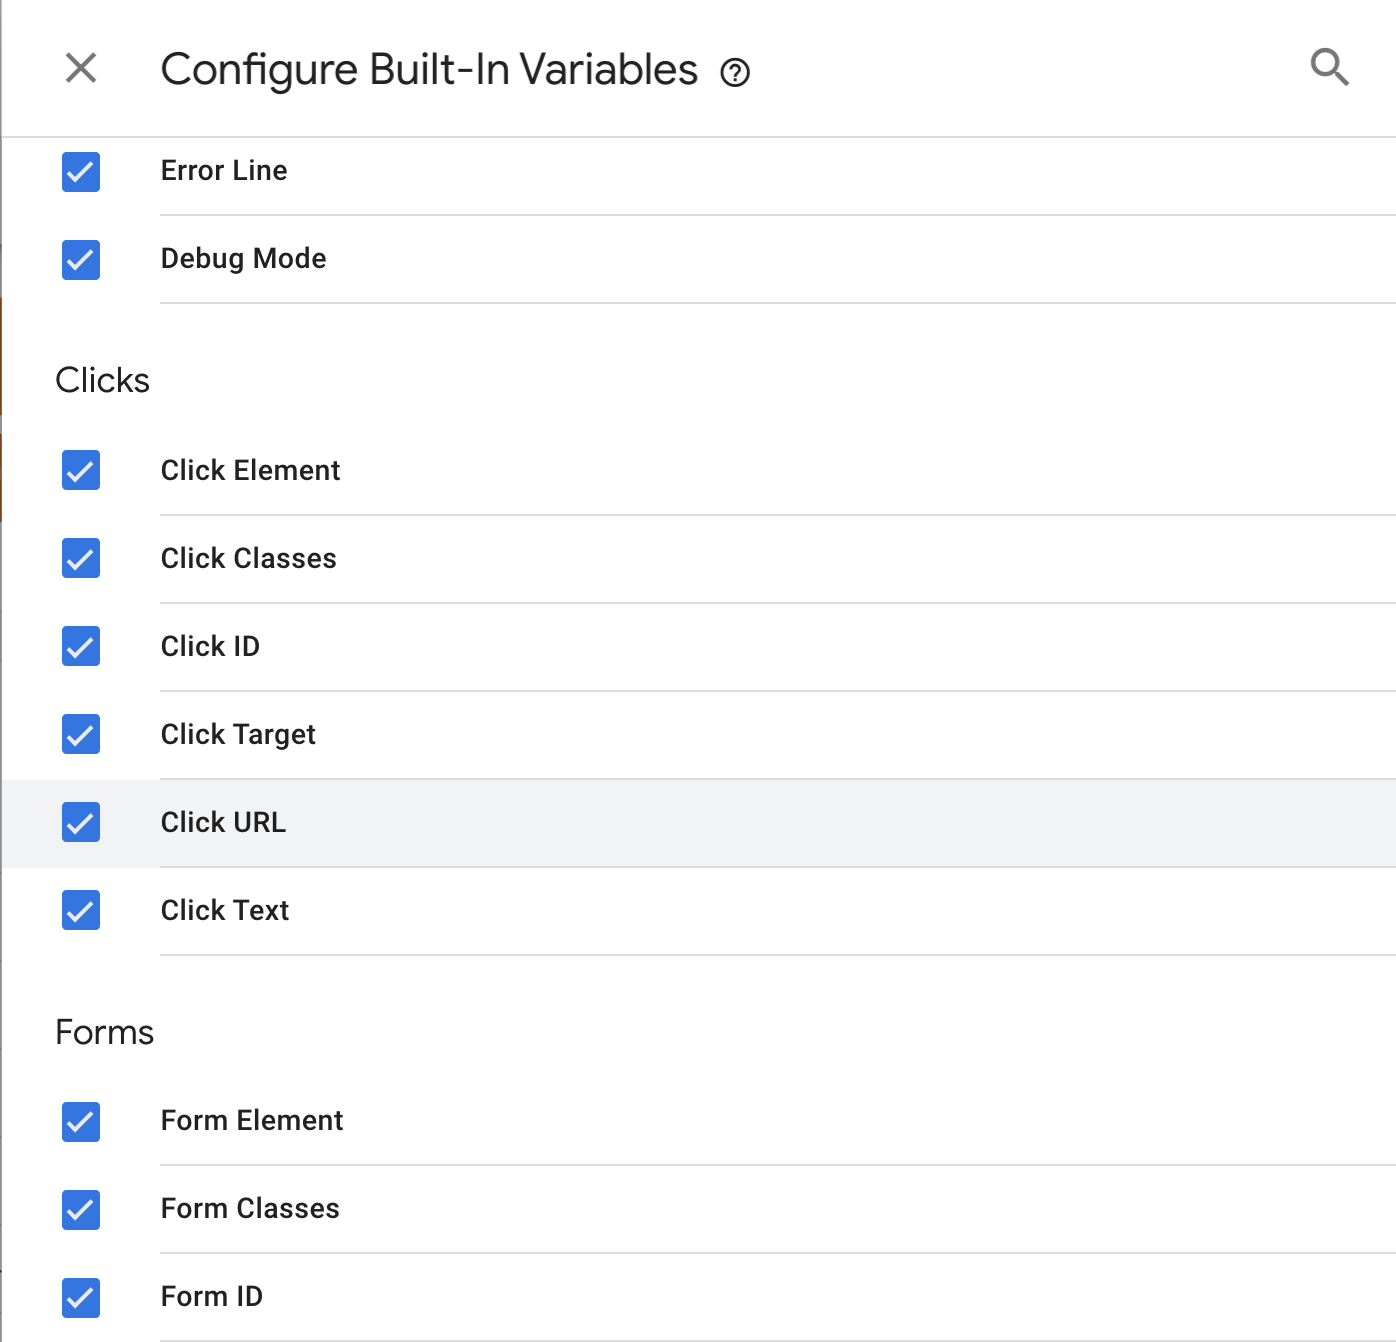
For your event tag configuration, you will require the built-in variable “Click URL”. If you have not used this variable before, then you have to select and enable it. To do so, navigate to “Variables”, and in the section “Built-In Variables” click on “Configure”. Scroll to the various Click-Variables and set a check mark by “Click URL”.
Step 3: Create the “Just Links” Trigger
To set up the trigger for external link clicks, follow these steps:
- Navigate to “Triggers” in the left-hand sidebar and create a new one.
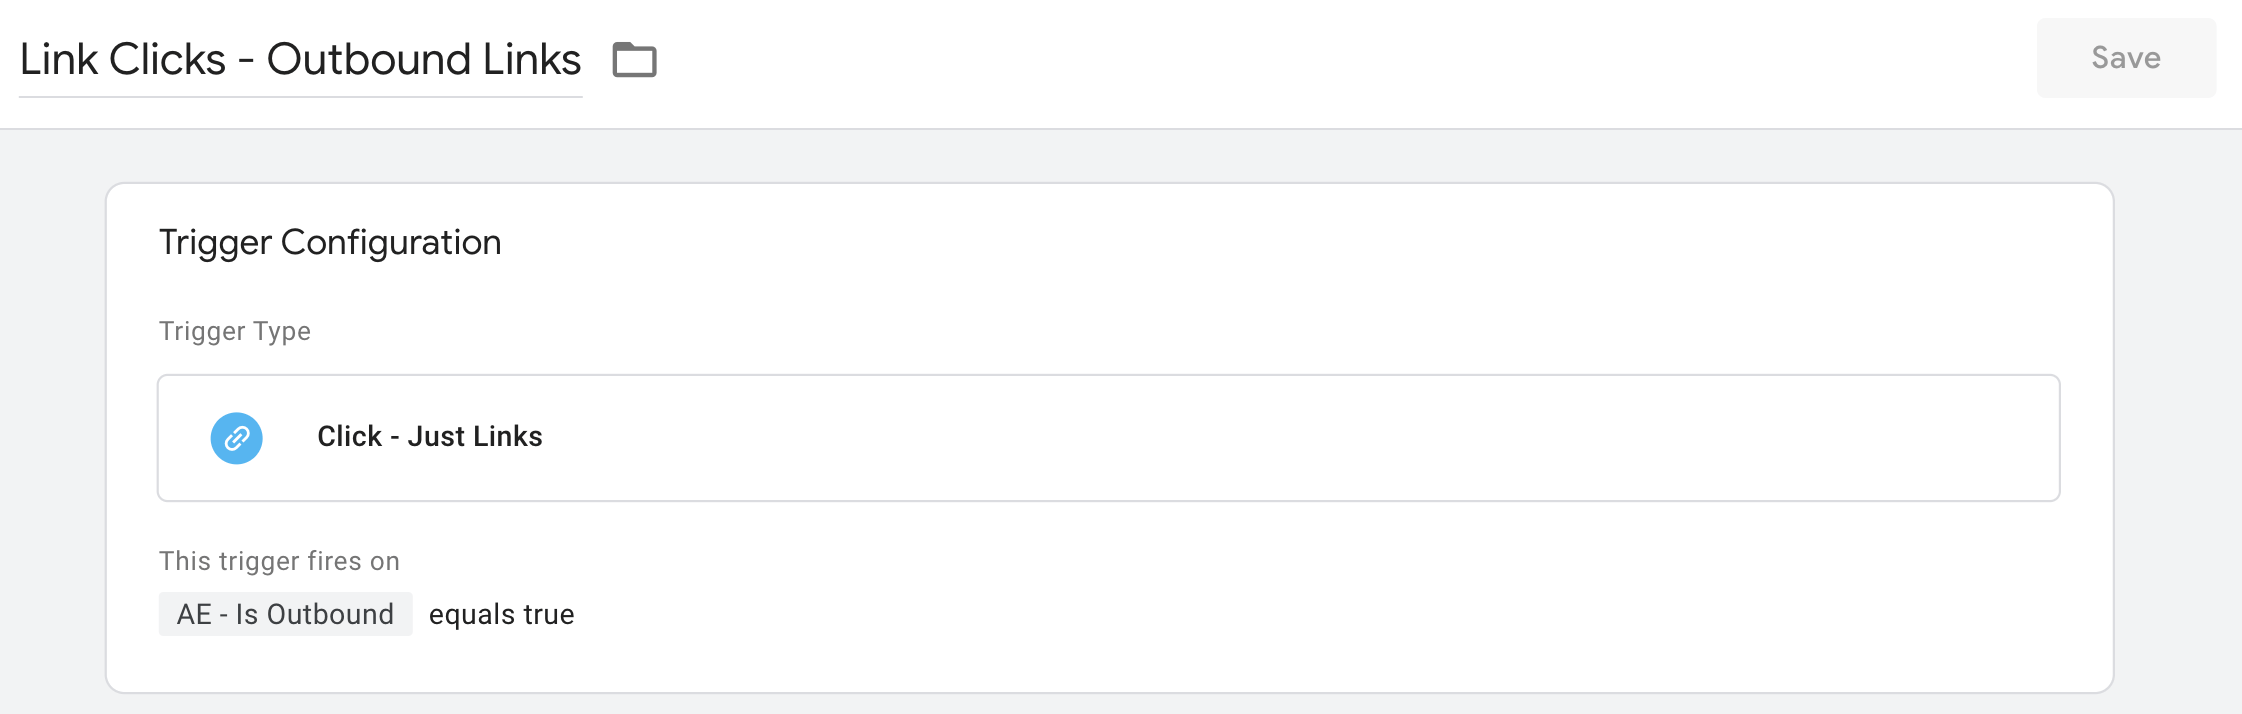
- Provide a descriptive name like “Link Clicks – Outbound Links”.
- Choose Trigger Type: “Just Links”. This requires that the click is specifically on a link, not a button or other page element.
- For the trigger condition, set it to “Some Link Clicks” > Variable: “AE – Is Outbound” > “equals” > “true” as the value.
- “Wait for Tags” and “Check Validation” options: “Wait for Tags” ensures that all tags that fire on the trigger execute first before proceeding with the action of the event. For your “Just Links” trigger, the redirect is halted long enough for all dependent tags to complete execution, after which the action is resumed. “Check Validation” checks if the click was actually valid. These can be set freely but we would recommend leaving them unchecked for this trigger in most situations.
Note: Links must be valid URLs and not any other types of links, like to email addresses or phone numbers, to be considered an outbound link.
This is what the trigger configuration looks like:
Step 4: Create the Outbound Link Click Event Tag
This tag will use the Auto-Event Variable and the trigger you created. Create it by following these steps:
- Go to > “Tags” > “New” to create a new tag
- Name it ” GA – Event – Outbound Links”
- For your tag configuration, choose “Google Analytics: Universal Analytics” as your Tag Type.
- Track Type: “Events”
Enter the following settings as displayed:
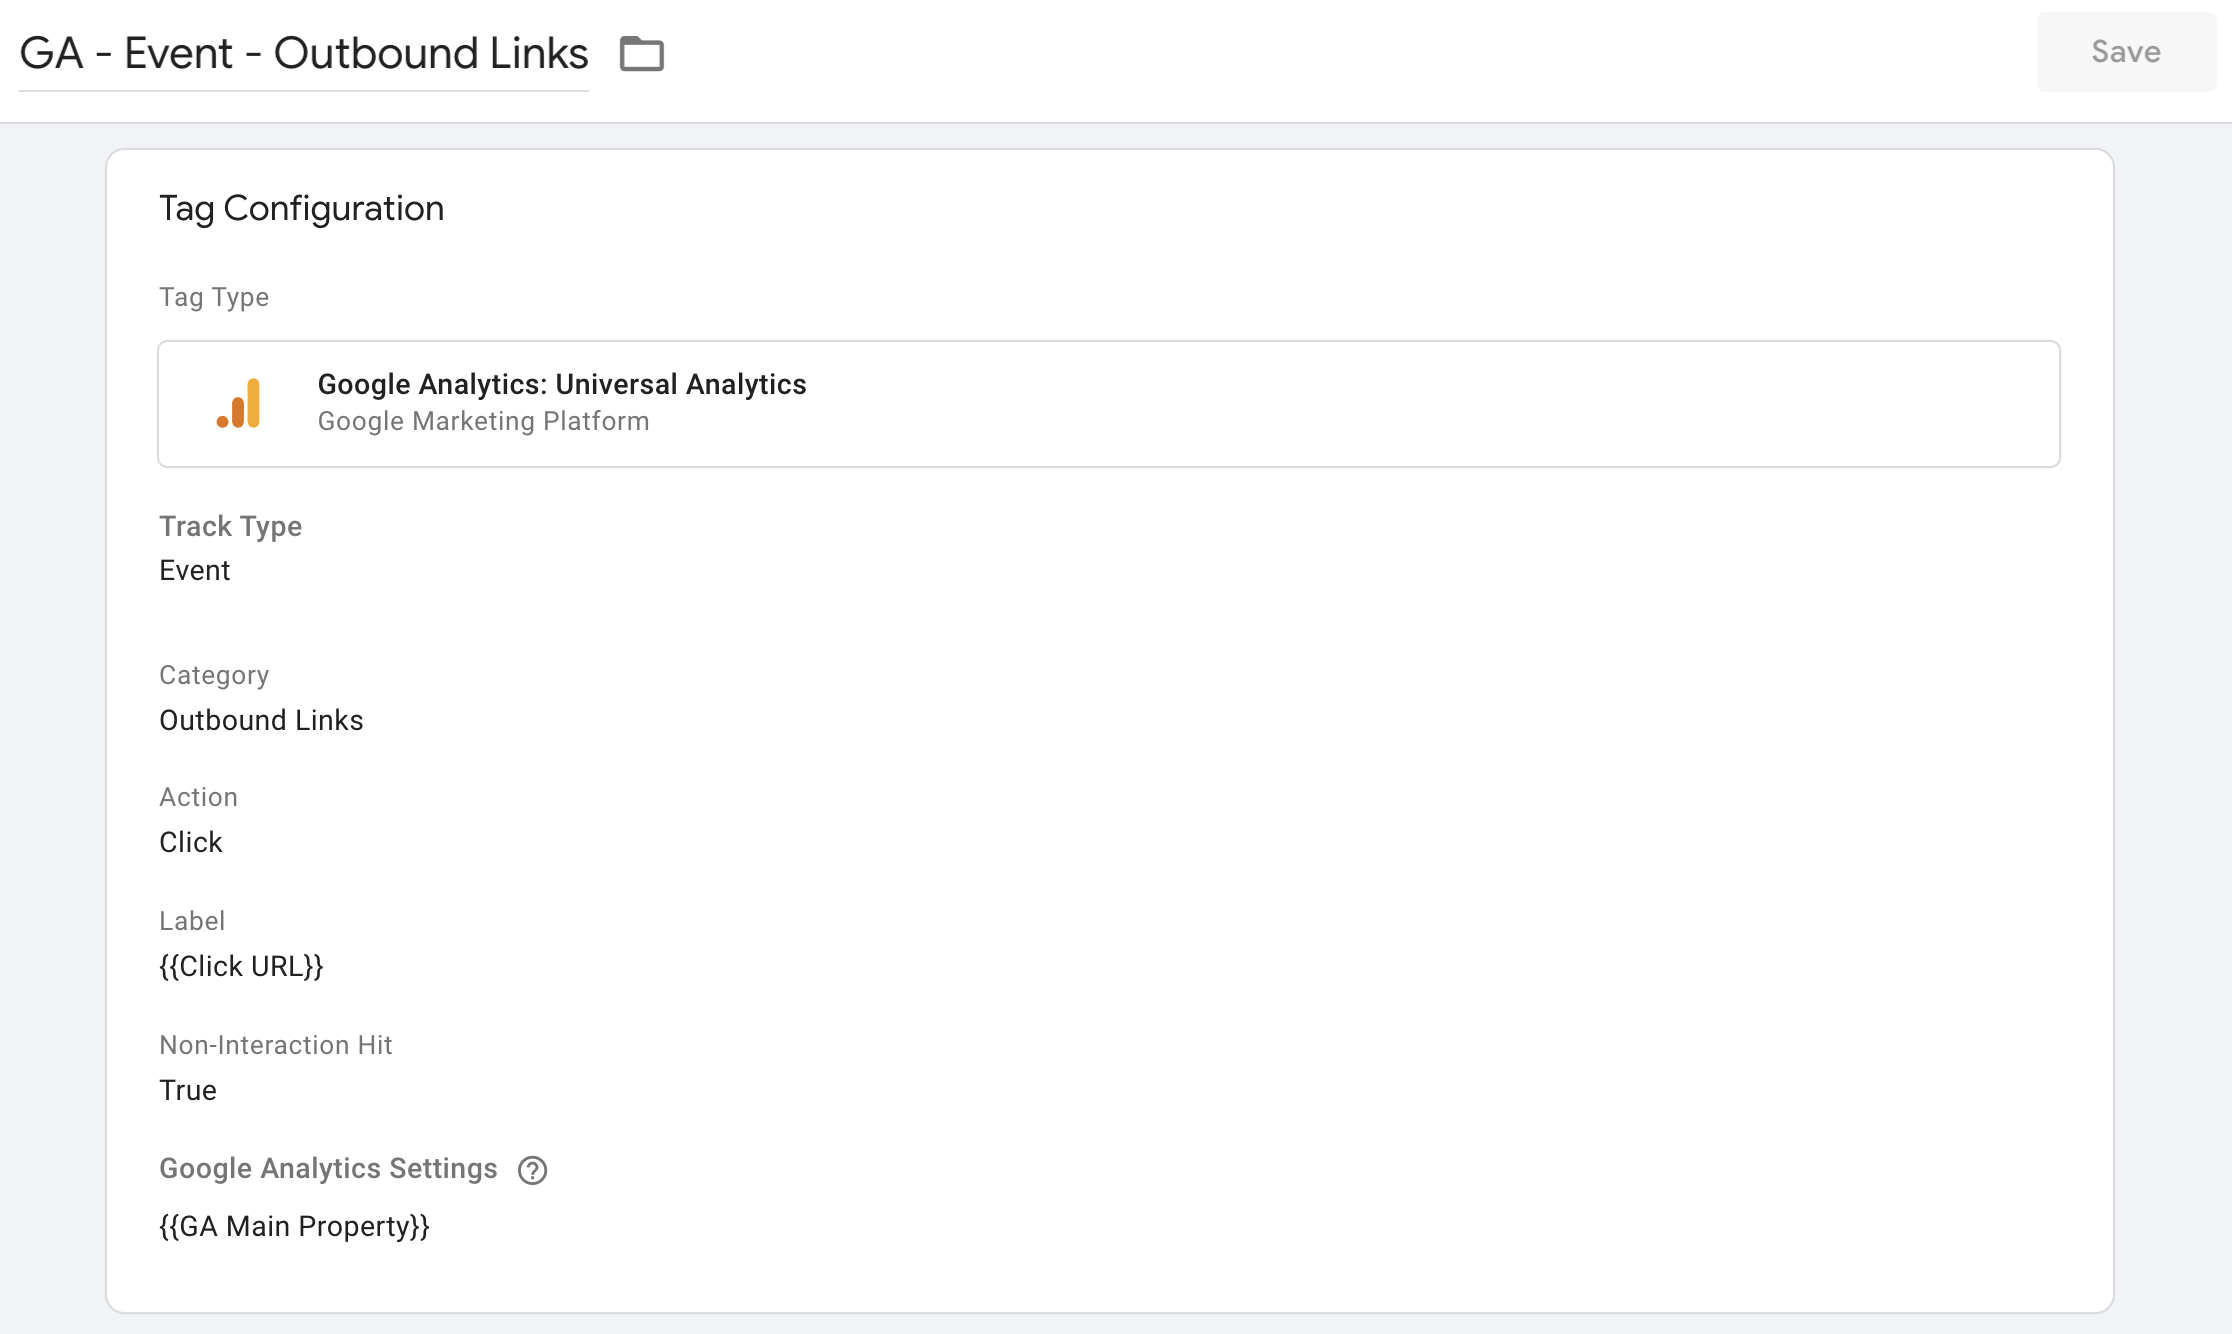
- Non-Interaction Hit: Set to true. This means that this event will not affect your bounce rate because it will not be counted as an interaction on your site. This makes sense for outbound links, but for many other events you may want to count the event as an interaction.
Step 5: Save a Version, Test, and Publish
The tag you just created will not start working until you publish it but, first, you should thoroughly test that it is working as expected. Having saved your tag, enable the Preview mode (click on “Preview” in the top right corner), go to your website and refresh the page.
Make sure to cover these test scenarios for outbound link tracking:
- Click an internal link: the outbound link GA tag must not fire.
- Click an external link: the tag must fire.
The Google Analytics Real-Time Event Report should display your event hits if everything is working properly. Read our blog post on Google Tag Manager Testing Problems and how to fix them if you run into any issues.
If all your tests are successful, then you can click the “Submit” button in GTM. Give this published version a name like “Outbound link event added” and click “Publish”.
Next Tutorial Coming Up
In this first part of our guide, we have explained how you can easily set up automated outbound link tracking with the help of the Auto-Event Variable in Google Tag Manager.
Stay tuned for the next updates to our guide! We will show you more GTM simplifications, and the new user interfaces, that will make your tracking more reliable and easier to implement.